Wednesday, August 14, 2013

The Gift of Community: Mangalorean Wedding Pickle

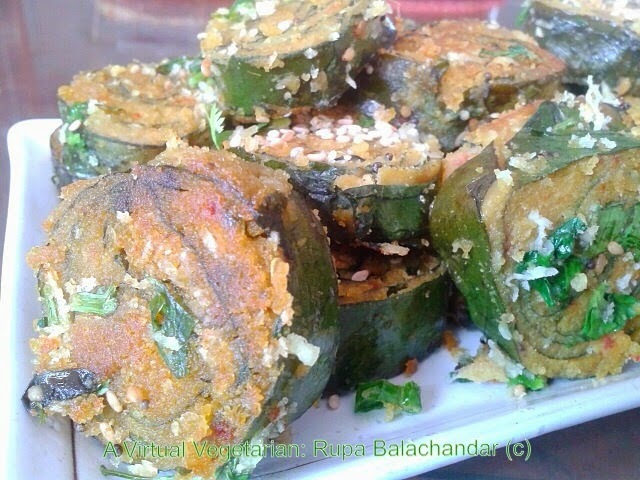
I first tasted this pickle at my dearest friend P's home. She had just returned from a family wedding and this was part of the goodies she brought back with her. While catching up at dinner we were served this amazing pickle! My hubby who is very fond of all things sweet and sour tasted this pickle and boy did he like it. It is was an unusual combination to us.....Ivy gourd and carrots! Never imagined that it would/could make such an addictive pickle.

P dug up her copy of the Mangalorean Ladies club cookbook and we found the recipe. I made a batch and on tasting, P gave it 2 thumbs up in terms of taste and flavor. 

This pickle is prepared weeks before a wedding takes place in the community. Women relatives and neighbors gather one afternoon and cut the vegetables to make the pickle.... such a warm and communal feeling that we lack in the modern era of nuclear families.

Fast forward.

A few year ago when we were in India for a short stint I was able to team up with a neighbor G mami (age 75+) and made pickles and preserves all through the summer, it was such great fun as I relived some of my childhood summers through the process! My only regret was that I did not try making papads. G Mami is the quintessential "Iyer Mami"  immensely talented and is like the Energizer bunny, always doing something whether it be cooking meals for the family (she cooks most of the 3 course meals daily) visiting temples, maintaining fasts and conducting poojas and had very busy social calendar. However she always had time to do so many "other"activities, I often wondered how she did it and if I would have the same enthusiasm and vigour when I am her age. When Making this pickle I thought she may not appreciate it, but her family liked it so much that she made a batch too!
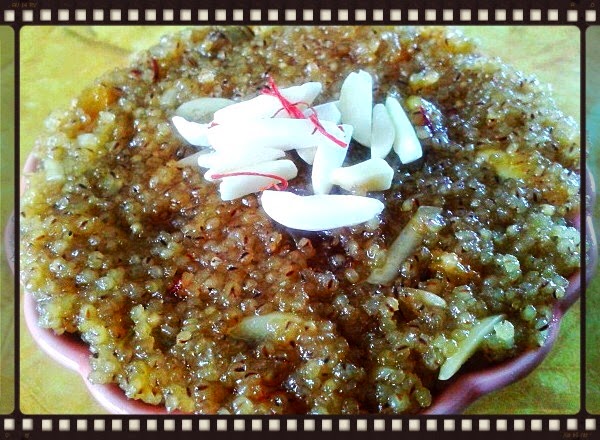

Ingredients
500 gms, carots, peeled and sliced into inch long matchsticks
500 gms, tendli, (ivy gourd) thinly sliced
1 cup garlic, peeled and sliced
1/4 cup crushed garlic
1/2 cup green chillies, sliced
1/4 cup curry leaves
1 1/2 cup vinegar
1 1/2 cup water
1/4 cup sugar
1/2 cup sesame oil
2tbsp + 2 tbsp salt

Pickle powder
1cup dry red chillies ( mix Byadgi and spicy chilies in equal amounts)
2 tbsp Chana dal2 tbsp urad dal (dhuli)
1 tsp sesame seeds
1/2 tsp methi Dana
1/2 tsp mustard seeds

Dry roast all the above ingredients, individually on a pan on low heat. Mix and make a fine powder. Set aside.
Method
Mix 2 tbsp salt with carrots and tendli/kundru and place in a large plastic container. Set a plate smaller than the bowl on top of the vegetable and place couple of heavy cans so that the vegetables are made to sink into the juice/liquid that it releases. Allow it to brine for a day or two. Remove from the brine and sun dry the vegetables for another two days.After the vegetables have dried, make the pickle powder and keep aside. Heat vinegar and water and boil the garlic and green chillies till the color fades (10-12 minutes). Remove the garlic and green chillies and keep aside. In the remaining vinegar solution, add the sugar and allow it to melt and become a bit syrupy (approx. 3/4 cup).Heat sesame oil, add crushed garlic ( use a large kadhai to do this, as the oil will froth up quite a bit), cook for a minute, and add curry leaves. Turn off the flame and as it cools add the garlic and green chillies (boiled). Add the dry vegetables and the vinegar syrup and powdered masala. Taste to check for salt. Store in a glass/porcelain container and it is ready to use in two days.
* The traditional recipe also calls for raw papaya....I did not use it.
* * I use this pickle as a sandwich spread, or on top of rotis, with plain rice and dal.....endless uses! 
* * * Its addictive..... :)

Tuesday, July 30, 2013

When you are in a squeeze try Lemon Rice


This diminutive fruit wields great power and can transform many a dish. I love lemon rice, a traditional South Indian rice staple and is often made when you have surprise guests or in a time crunch or to make when traveling.


Ingredients
3 cups cooked white/brown or unpolished rice
Juice of 2 limes/lemons, reserved
2tbsp raw/roasted peanuts (optional)
1tbsp Urad dal
1 tbsp Chana dal
2 tsp ginger, finely chopped
1 tsp turmeric
1tsp chopped green chilli
1/2 tsp hing/asafoetida
1/2 tsp mustard seeds
Few curry leaves
Chopped coriander leaves for garnish
2 tsp oil
Salt to taste

Method
Heat oil in a pan, add urad dal, Chana dal, peanuts and allow them to brown, add mustard, hing, curry leaves, green chilli, turmeric and salt. Stir for a moment. Add lime juice and stir to mix ingredients. Add the rice and Stir on low flame till all ingredients are well mixed. Turn off, garnish with coriander leaves and serve with chutney and raita/yoghurt.


Saturday, July 20, 2013

A Pinwheel Delight: Patra, Patarvelia or Alu Vadi

I don't like to spend hours on end in the Kitchen to cook up a meal. Ideally I like to spend no more than 30 minutes from start to finish! I'm usually asked how is it possible to put together an Indian meal comprising of Dal, Subji ( dry/gravy vegetable dish), salad, roti and rice in such little time. The trick is in planning ahead and breaking up the process and a trusty pressure cooker. While the rice and dal cook in the cooker, I chop up vegetables for the Subji, salad and the Dal seasoning, so it's quite easy to put a meal together!

You ask, how does a time and motion study work into this post....well it doesn't!
One of the few dishes I'm willing to spend more than half hour on, is the quintessential Gujarati snack time favorite, the Patra, Patarvelia or Alu Vadi. Oh how my better half loves this dish, so I make it once a month if I can find the Taro/colocassia leaves at the supermarket and make a double batch so that there is always some in the freezer.


For Patra stuffing

9-12 large patra leaves (colocasia leaves), about a foot long each
1/2 cup thick tamarind extract
2 cups gramflour (besan)
1/2 cup chopped coriander leaves, finely chopped
2 tbsp grated coconut (optional)
2 tbsp sugar
2 tbsp crushed ginger
2 tbsp crushed green chilli
2 tsp chilli powder
1 tsp cumin powder
1 tsp turmeric powder
1/2 tsp asafoetida
salt to taste

For seasoning
2-3 tbsp. oil
1 tbsp sesame seeds
1 tsp mustard seeds
 1 tbsp coriander leaves, finely chopped
1 tbsp coconut grated fine
1/4 cup water

Method
Clean, wash and wipe leaves. Cut thick veins on the leave using a paring knife taking care not to tear the leaf. Lightly roll with a rolling pin over the veins and set aside.

Mix all ingredients for stuffing and make a thick paste. Place the underside of the leaf facing up on a flat surface and apply a thinnish layer of the paste all over the leaf. Place another leaf over it. Create 2-3 layers of leaves/paste, with the final layer being that of paste. Now carefully fold 1 inch of the edge of the leaf towards the center on either side of the leaf. Then starting on the widest part of the leaf start rolling the leaves into a log similar to rolling a Swiss roll. Making sure that the roll is tightly rolled. Repeat steps with balance of leaves.

Heat a steamer pot and using either a Steamer basket/perforated tray or dhokla stand place the prepared rolls, cover and steam for 25-35 mins on a medium flame. Make sure to check water levels in the steamer pot occasionally. The rolls are done when you insert a knife into the roll and it comes out clean. Allow it to cool completely and cut into discs 1/2- 3/4 inch thick with a sharp knife in a gentle sawing motion, taking care not to tear the outer leaves. Set aside.

Heat oil in a pan add mustard seeds and allow to sputter. Turn off the flame and add rest of the ingredients. Gently slide the discs and allow to brown. Serve warm or cold with green coriander chutney.

Wednesday, June 19, 2013

At the root of good health: Fresh Turmeric, Ginger Pickle

Fresh Turmeric root has many medically proven benefits. From the dreaded Cancer, Alzheimer's, Rheumatic Arthritis, IBS to common ailments like influenza, cough/cold to asthma.

Yesterday, on a food forum a poster asked why turmeric was used to boil meat? The answer is that Turmeric has anti microbial properties which are said to kill several strains of microbes like salmonella and candida that tend to spoil non refrigerated foods.


This is a "fresh" pickle my Mom made whenever there was a profusion of fresh turmeric root at the green grocer. In SEA it's fairly easy to find fresh turmeric root at most vegetable vendors, and we often found it at most East Indian/Chinese grocers in the US.


Here is the recipe for an easy pickle, crunchy and tangy! Since the recipe uses no oil or vinegar, this pickle is best to stored in the fridge or it losses its tartness and crunchy bite. 


I make a cold (cooked)millet salad with tomatoes, sliced onion and couple of generous spoons of the pickle. Sometimes I eat it with dosa/idli, or tossed with boiled pasta, or as a topping to my sub style sandwich.

Turmeric ginger chilli pickle


Ingredients

1 cup turmeric root, peeled and sliced
1/4 ginger, peeled and finely chopped
5 green chillies, chopped
Juice of 2 large limes
Salt to taste
Method
Mix the turmeric, ginger and green chillies with salt and lime juice. Store in a recycled glass jar.


Thursday, May 30, 2013

Gourmet Goddess: A Sasam Tale


I joined the Indian Women's Organization and found its a great way to meet like minded individuals, especially when you are new to a place. They organize many noteworthy events and as recent as last week a sub group titled Gourmet Goddess planned an event.....but of course I just had to attend/join a group with such a fabulous name!

The show-n-tell held last week was themed Mango: Sweet and Savoury. Each member had to cook/bring a dish featuring the main ingredient: the Mango, and each participant had to do a brief introduction and method of making the dish. 

I felt I should make a dish that would be a bit unique....but what? So I questioned friends, asked on a food forum, and then realized I had a dish in my own repertoire! The Sasam, a Konkani GSB dish that is very essential to their cuisine. Sasam means mustard in Konkani language and the dish features a gravy made with coconut and mustard. The dish is very versatile, can be eaten warm or cold, thick gravy or runny, and spicy or mild, you control the ingredients to your taste!


Photo Courtesy, Vidhya Nair


Konkani Mango/Pineapple Sasam

Ingredients

3 Cups, peeled and cubed fruit (mango, pineapple or both)
1/2 Cup mango pulp
10-12 chopped green/red grapes, chopped in half
1 cup fresh grated coconut (white only)
2-4 dry roasted whole red chillies
1 tsp tamarind paste
1 tsp mustard seeds
1 tbsp grated jaggery
Optional
1 tsp coconut oil
1/2 tsp mustard seeds
6-8 curry leaves
Salt to taste

Method

Mix jaggery with fruit, pulp and set aside. Grind coconut, red chili and mustard to a fine paste, add salt and mix with fruit. Refrigerate until ready to serve. Adding chopped grapes enhance the taste and presentation.

Optional:  Heat oil add mustard seeds and let it sputter, add curry leaves and pour over fruit mix.

Since the dish is not cooked, it's flavor and quality will deteriorate rapidly if kept at room temperature.

Wednesday, May 29, 2013

On the Silk Road: Lauki ke Kofte


This year my son studied the silk route extensively and I enjoyed reliving a bit of my childhood through his quest. Part of the reading requirements was to read about the  famous travelers of those times and the life they lead. During the research we looked at food and how one can see the footprints it left on the local cuisine along the route. It's pretty obvious that meat was skewered and placed on a spit to cook, but new techniques of mincing it, rolling it into balls and letting it simmer in a gravy was the next step in the mixing of cultures and this is where my recipe steps in...a vegetarian version of the famous middle eastern dish of Kofte.

My husband is very fond of Kofta, especially Lauki, better known as Bottle gourd or Luffa.  While he was in grad school he said a friend of his made Lauki ke Kofte that melted in the mouth and wanted me to re-create it...alas I tried for years, but my kofta's were always hard as golf balls. I eventually came to the conclusion that all the recipes I tried weren't working! So first was the de-learn all the previous recipes I had tried ( almost 30+). I started fresh and made a bulls eye on first try, lucky me !Here is the recipe that took me over a decade to arrive at, lucky you!


Ingredients for Kofta
1 medium sized bottle gourd, grated and mixed with 2 tsp salt and placed on a colander to drain liquid, Save this liquid
1 medium sized potato, grated
3 tbsp besan/gram flour
2 tbsp sooji/semolina
1 tbsp wheat flour
2 tsp coriander leaves, chopped
1 tsp garlic, grated
1 tsp ginger, grated
1 green chilli, finely chopped
1 tsp oil
1/2 tsp coriander powder
1/2 tsp cumin powder
Pinch of baking powder

Method for Kofta
Squeeze out the water from the grated gourd. Save this water. Mix all ingredients gently and allow it it sit for half an hour. Roll into small balls approximately the size of a medium lime. Place the balls on a foil sheet and spray cooking oil and bake in the oven at 150 degrees for 10-12 mins, the outside will take on a golden hue. Remove from the oven and keep aside. If you prefer, you can deep fry the Kofta as well.


Ingredients for Gravy
4 medium onions, chopped and blanched in the microwave
2 tbsp tomato paste, if using purée, then you will need a bit more
2 cups milk
2 tbsp Everest brand tandoori masala (optional)
2 tbsp Everest brand kitchen king masala
1 tbsp kasoori/dry methi leaves, roasted
1 tbsp sugar
1 tbsp chopped coriander leaves
1 tbsp garlic, grated
1 tbsp ginger, grated
1 tbsp oil
1 tbsp ghee/butter(optional)
2 green chillies slit down the middle
1/2 tsp cumin powder
Salt to taste

Method
Cook the chopped onions with 1/2cup water in the microwave for 4-6 mins, when cool, blend it. Heat oil and ghee, add onion paste and cook till it turns grey. Add tomato paste and all the dry masala powders. Cook till emits a beautiful aroma. Slowly add the milk, leftover liquid from grated bottle gourd and keep stirring till it thoroughly mixes. Cook for another few minutes, add sugar, salt, Kofta balls, coriander leaves and powder. Serve warm with roti/rice.

Wednesday, May 22, 2013

Not just for the Birds : Bajre ka seera


In a previous post on Millet, I made an Indian flat bread- Bajre ki Roti. I would like to add a dessert to the Gluten free theme.

Millet is great substitute for wheat berries or couscous. It's a great dish to make when feeling that urge to eat something sweet, but are hesitant to consume tons of calories, or if you have chosen a gluten free lifestyle.

The other special ingredient is Gula Melaka, an unprocessed sweetner that is a healthier option to white sugar. If you cannot find Gula Melaka, then substitute with natural maple syrup, agave nectar, palm jaggery, or jaggery.


Ingredients
1 cup Bajra/millet seeds
2 1/2 cups water or a equal mix of water and almond milk
1/2 cup Gula Melaka or jaggery
2 tsp raisins
2 tsp chopped nut of your choice, I used Almonds
2tsp ghee/butter
Few strands of saffron


Method

Heat ghee add raisins and almonds, allow to fluff up and remove and set aside. In the same pan add bajra and allow it to roast for a few minutes. Add saffron, water and cook until the millet turns soft (you may have to add more water if necessary. Add the Gula Melaka and cook until dry, mix in the nut and raisins. It tastes best when still warm.
Enjoy!

Tuesday, May 21, 2013

Pumped about Pumpkin: Pumpkin and Methi subzi

There has never been a more versatile vegetable than the Pumpkin, in my opinion.

Pumpkins are grown on every continent and blends so well into each unique food culture. In Africa they make a superb soup with pumpkins and peanut, in Brazil they make a refogada - a stewed dish, in Thailand they cook it with basil in a red sauce, in Italy they make pumpkin stuffed ravioli, and in Norway they make sweet pumpkin pickle, and I can go on endlessly!


When I lived in Connecticut, I used to exclusively buy produce at the farmer stands, except in the dead of winter!  Come fall we would be spoilt with the variety of different gourds and I particularly love spaghetti and Kabocha squash, however I always picked up the traditional red pumpkin. 


Coming to todays featured recipe, is a dish that my better half likes. He spent quite a few of his childhood years in interior Maharashtra( Indian state who's capital is Mumbai) and so is particularly fond of Pumpkin, as it a staple in traditional Maharashtrian fare. Over the decades, I have gathered quite the repertoire of Pumpkin dishes and this one is my particular favorites. I'm not sure if it is an authentic recipe from anywhere.....I don't really remember reading the recipe any where, so I can safely call it a Indian fusion dish. I would love to hear if you have eaten something like this, and what it is called.


This dish has a variety of different flavors, sweetness from the pumpkin, bitter from the fenugreek, pungency from the garlic and onion seeds and aroma from the fenugreek seeds. What I like about this dish apart from the flavors is the ease in prep and quick cooking, from start to finish around 15 minutes.


Ingredients

2 lbs pumpkin with skin on, cubed
1 cup fresh fenugreek leaves or 3 tbsp dried leaves (aka Kasuri methi) reconstituted in water (discard water before use)
1 medium sized onion, finely chopped
1 medium sized tomato, chopped
6-8 large cloves of garlic, sliced
1 tsp ginger, grated
1 tsp fenugreek seeds
1 tsp red chilli powder
1 tsp sugar 1/2 tsp asafoetida
1/2 tsp turmeric powder
1/2 tsp black onion seeds (kalonji)
1/2 tsp sesame seeds
1 + 1 tbsp oil and ghee/butter
Salt to taste

Method
Heat oil add whole spices and allow to sputter. Do not let the fenugreek seed blacken or it will impart a very bitter flavor. Add garlic, ginger and sauté for a few seconds, then add the onion and cook till they become translucent. Add the fenugreek leaves and sauté for another few minutes. Add cubed pumpkin and all spice powders, except the sugar. Cover and cook on low flame until pumpkins are soft but not mushy. Add sugar and serve with roti or rice and dal.

Sunday, May 19, 2013

Pickle turns Green : Stuffed Green chili pickle


I like to have a little spicy something with my Indian meal. With kids at home my daily cooking is devoid of any chili spice and so to add the extra zing to my mealtime I turn to the humble staple in my kitchen, Pickles.

I make a variety of them depending on the season and the what is freshest at the local wet market, that's what the daily produce market is called in Singapore. 

On a recent Sunday I trudged down to Tekka market in Little India to buy some vegetables that are uniquely Indian, like snake gourd, Ivy gourd and the ubiquitous Alphonso mango that I had been craving to eat. While shopping, I spotted these little green chilies common in South Indian cuisine to make sun dried chili that is fried and eaten with Yoghurt rice, it's called Moar Molagai. Since I have a stock of last years Moar Molagai, I decided to make a North Indian stuffed chili pickle, which my better half loves! 

We usually have store bought Punjabi stuffed chili pickle, but I don't like the fact that they make them with really large  (3+inches) red chilies. At every meal I have to cut up smaller pieces that have to be used up within a few days or they lose flavor, so I decided to make a small single use version at home. 


Ingredients:
Dry Roast and powder the whole (5) spices
1/4 cup coriander seeds
2 tbsp Saunf/anise seeds
1 tbsp fenugreek seeds
1 tbsp black mustard seeds
1 tbsp cumin seeds
~~~~~~~
2 tbsp dry mango powder
1 tsp black salt
2-3 tsp salt
Juice of 1 lime or 3 tsp apple cider vinegar
1/2 Cup mustard oil
200 gms green chili of your choice like Serrano, small jalapeños, but not the very hot varieties

Method
Wash and wipe dry the green chilies making sure that there is no moisture on them. Slit the green chillies carefully in the center, but not all the way through. You are creating a pocket in the chilli to stuff the powder mixture.

To the roasted whole spice powder add the salts and mango powder. Mix well and stuff the chillies. Sprinkle the lime juice/vinegar on the chillies. 

Heat oil and allow to cool completely. In a dry glass jar ( I reuse the pasta sauce jar)  drop the chillies in carefully and add the cooled oil. If you have any leftover stuffing powder left add this to the jar as well. Place the jar for a day or two in a sunny spot, giving it a good shake or two, twice everyday until you see the green color on the chilli fade. (See photo)

Keep it refrigerated if you make a large batch, keeping it cool helps the chillies stay crunchy.